It rarely happens that we are 100% happy with how a project turns out. But my new raised bed garden is a dream come true! It sounds a little crazy, but sometimes having so much space can be intimidating. This raised bed garden is a combination of nine raised beds in a single, cohesive design that I love.
I attended a conference in February where a presenter shared her formal garden comprised of raised beds, pergolas and trellises. In Iowa. Yes, this is what I am talking about! Spurred on by her success and successful design, I started sketching out possible ways to lay this out on notepads. It is hard to picture how a raised bed garden will look when you are drawing it on paper, but after 8-10 different versions this is what we settled on.
Raised Bed Garden Design Criteria
These are some of the things that I said I wanted in my garden design:
A strong east-west axis that is uninterrupted by beds.
Beds no wider than 4 feet so that they could easily be accessed from both sides.
Paths of gravel.
Arched trellises made from cattle panels.
Access to water nearby (this really was already in place, but determined where the garden would be located).
Using gridded notepad paper makes this much easier. Lining up walkways, beds and borders is easy to do.
With these things in mind, I was happy with a design sketch and flagged out the outside diameter of the bed in the current grass lawn. Surprisingly, it wasn’t as large as I thought it would be! A main concern of Mike’s was how manageable this would be to maintain and this small(ish) footprint was a relief.
Raised Bed Garden Building Materials
Starting with a grass lawn, our goal was to get these beds completed before field planting. Essentially, we needed to get black soil from the field to fill the beds and this wouldn’t be possible after corn was planted (early May).
Beds are constructed of treated 2″ diameter boards. Treated lumber cost about 50% more than untreated but should last many years.
3″ long lag screws are used to hold these together. We used 2 on each corner.
Landscape fabric was put down after the beds were in place to provide a base for the gravel.
1/2″ Chips from Benton’s Sand & Gravel make up the pathways.
Hog panels for arched trellises with 4 t-posts for each panel
The biggest hurdle to our construction process was trying to get things to line up square. We constructed the beds and then used string and measurements to (attempt) to get things lined up. Overall it looks good, but a very close inspection is brutal. In the end, we decided the east-west axis needed to be the priority and then we adjusted everything from there.
Fence Panels for Trellises
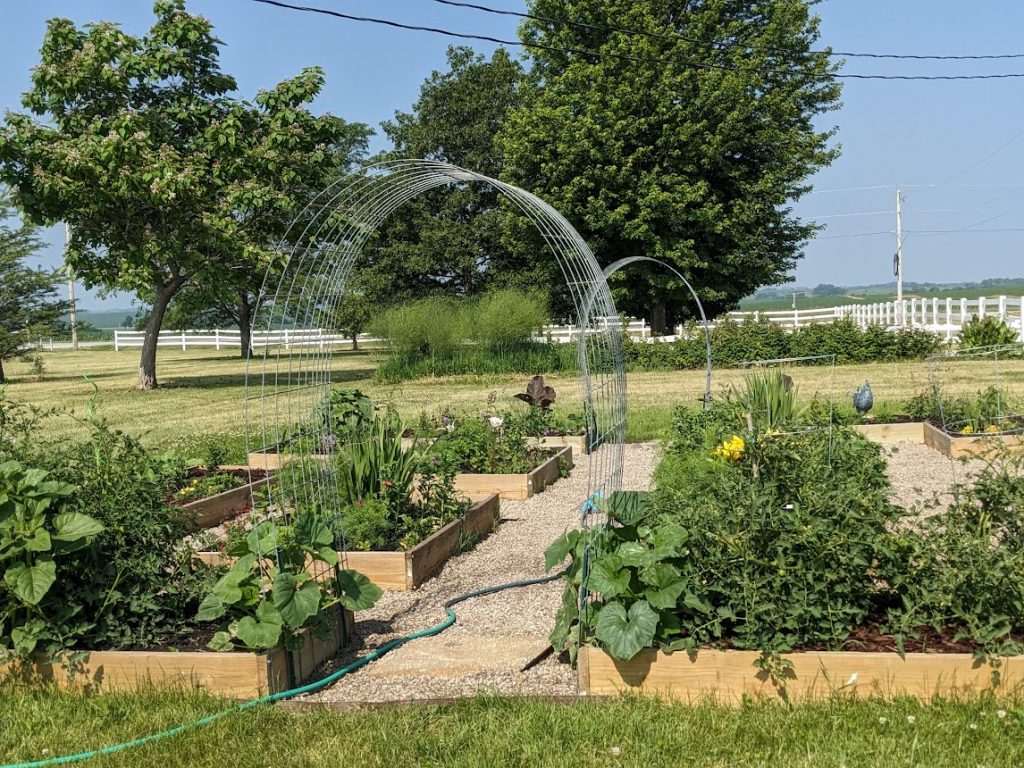
We used 36″ wide hog panels for the arched trellises on each end of the garden. This is a very easy project that provides a lot of structure to the garden during the early part of the season.
To do this, we installed two T-posts on each bed, leaving just enough room between the post and the wood to slide the fence panel between. The panel takes a little bit of pulling to get in (definitely a two person job!), but is a quick process. I did wire these panels to the posts for a little extra security.
Gravel for Paths
The “final” step for our raised garden bed project was to add 1/2″ gravel chips to the pathways. To be honest, we didn’t get to this until the end of June and I was starting to accept that it might not happen this season.
It took us two loads of gravel to get this done. Barely visible in the above photo, I did install garden edging at each of the openings. It is 4″ tall and I buried it in the ground roughly 2″ deep so that it is just tall enough to keep the gravel inside. With our young boys playing around here I think this was a really good idea (and probably one of the most labor intensive parts of this entire build!).
While a garden is never truly finished, I am so happy with how our raised bed garden has come together this year.
No Responses